Tag Archives: LEGO

The Raspberry Pi Build HAT and LEGO® components at our CoderDojo

Post Syndicated from Mark Calleja original https://www.raspberrypi.org/blog/raspberry-pi-build-hat-lego-education-robotics-coderdojo/

As so many CoderDojos around the world, our office-based CoderDojo hadn’t been able to bring learners together in person since the start of the coronavirus pandemic. So we decided that our first time back in the Raspberry Pi Foundation headquarters should be something special. Having literally just launched the new Raspberry Pi Build HAT for programming LEGO® projects with Raspberry Pi computers, we wanted to celebrate our Dojo’s triumphant return to in-person session by offering a ‘LEGO bricks and Raspberry Pi’ activity!
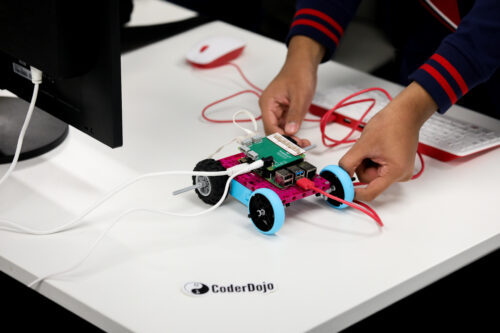
A robot buggy built by young people with LEGO bricks and the Raspberry Pi Build HAT.

Back in person, with new ways to create with code

The Raspberry Pi Build HAT allows learners to build and program projects with Raspberry Pi computers and LEGO® Technic™ motors and sensors from the LEGO® Education SPIKE™ Portfolio.
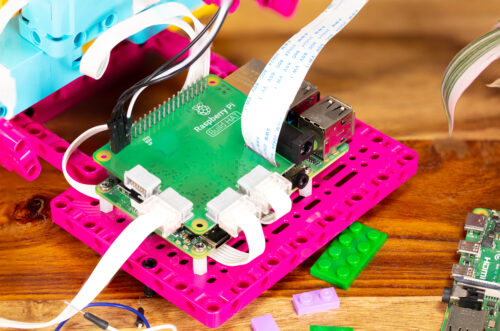
A close-up of the Raspberry Pi Build HAT on a Maker Plate and connected to electronic components.

What better way could there be to get the more experienced coders among our Dojo’s young people (Ninjas) properly excited to be back? We knew they were fond of building things with LEGO bricks, as so many young people are, so we were sure they would have great fun with this activity!
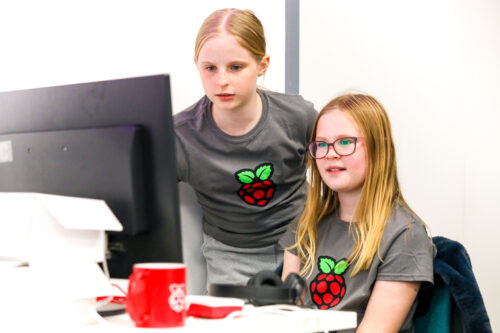
Two girls work together on a coding project.

For our beginners, we set up Raspberry Pi workstations and got them coding the projects on the Home island on our brand-new Code Club World platform, which they absolutely loved, so their jealousy was mitigated somewhat. 

Being able to rely on your learners’ existing skills in making the physical build leaves you a lot more time to support them with what they’re actually here to learn: the coding and digital making skills.

We wanted to keep our first Dojo back small, so for the ‘LEGO bricks and Raspberry Pi’ activity, we set up just four workstations, each with a Raspberry Pi 4, with 4GB RAM and a Raspberry Pi Build HAT on top, and a LEGO Education SPIKE Prime set. We put eight participants into teams of two, and made sure that all of them brought a little experience with text-based coding, because we wanted them to be able to focus on making projects in their own style, rather than first learning the basics of coding in Python. Then we offered our Ninjas the choice of the first two projects in the Introduction to the Raspberry Pi Build HAT and LEGO path: make Pong game controllers, or make a remote-controlled robot buggy. As I had predicted, all the teams chose to make a robot buggy!

""

Teamwork and design

The teams of Ninjas were immediately off and making — in fact, they couldn’t wait to get the lids off the boxes of brightly coloured bricks and beams!

Two young people work as a team at a CoderDojo coding club.

Our project instructions focus primarily on supporting learners through coding and testing the mechanics of their creations, leaving the design and build totally up to them. This was evidenced by the variety of buggy designs we saw at the project showcase at the end of the two-hour Dojo session!

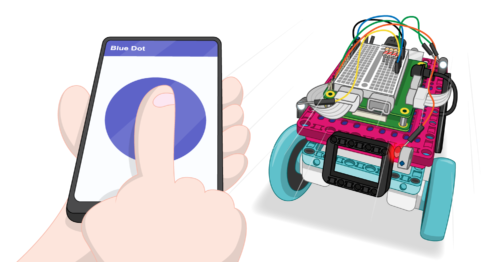
One of the amazing things Raspberry Pi makes possible when you use it with the Raspberry Pi Build HAT and SPIKE™ Prime set: it’s simple to make the Raspberry Pi at the heart of the creation talk to a mobile device via Bluetooth, and off you go controlling what you’ve created via a phone or tablet.

While beginner-friendly, the projects in the Introduction path involve a mix of coding, testing, designing, and building. So it required focus and solid teamwork for the Ninjas to finish their buggies in time for the project showcase. And this is where building with LEGO pieces was really helpful.

Coding front and centre, thanks to the Raspberry Pi Build HAT

Having LEGO bricks and the Build HAT available to create their Raspberry Pi–powered robot buggies made it easy for our Ninjas to focus on writing the code to get their buggies to work. They weren’t relying on crafting skills or duct tape and glue guns to make a chassis in the relatively short time they had, and the coding could be front and centre for them.

The most exciting part for the Ninjas was that they were building remote-controlled robot buggies. This is one of the amazing things Raspberry Pi makes possible when you use it with the Build HAT and SPIKE™ Prime set: it’s simple to make the Raspberry Pi at the heart of the creation talk to a mobile device via Bluetooth, and off you go controlling what you’ve created via a phone or tablet.

The LEGO Technic motors that are part of the LEGO Education SPIKE Prime set are of really high quality, and they’re super easy to program with the Build HAT and its Python library! You can change the motors’ speed by setting a single parameter in your code. You can also easily write code to set or read the motors’ exact angle (their absolute position). That allows you to finely control the motors’ movements, or to use them as sensors.

Some of our teams, inspired by everything the SPIKE Prime set has to offer, tried out programming the set’s sensors, to switch their robot buggy on or help it avoid obstacles. Because we only had about 90 minutes of digital making, not all teams managed to finish adding the extra features they wanted — but next time for sure!
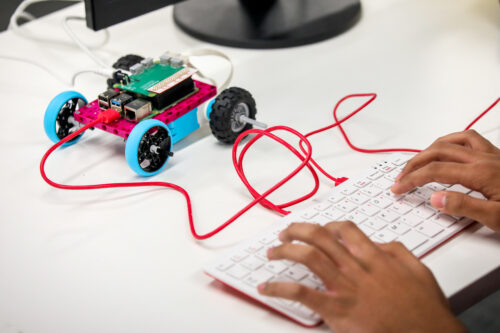
A young person programs a robot buggy built with LEGO bricks and the Raspberry Pi Build HAT.

With a little more time (or another Dojo session), it would have been possible for the Ninjas to make some very advanced remote-controlled buggies indeed, complete with headlights, brake lights, sensors, and sound.

Learning with LEGO® elements and Raspberry Pi computers

If you have access to LEGO Education SPIKE Prime sets for your learners, then the Raspberry Pi Build HAT is a great addition that allows them to build complex robotics projects with very simple code — but I think that’s not its main benefit.
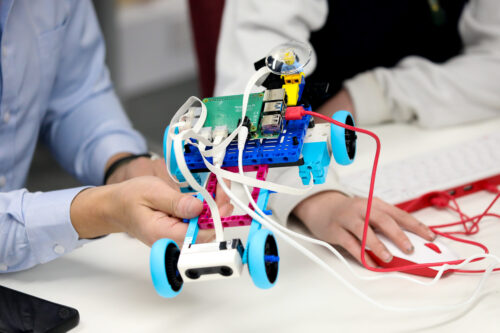
A robot buggy built by young people with LEGO bricks and the Raspberry Pi Build HAT.

Because the Build HAT allows your learners to work with LEGO elements, you know that many of them already understand one aspect of the creation process: they’ve got experience of using LEGO bricks to solve a problem. In a coding or STEM club session, or in a classroom lesson, you can only give your learners limited amount of time to complete a project, or get their project prototype to a stable point. So being able to rely on your learners’ existing skills in making the physical build leaves you a lot more time to support them with what they’re actually here to learn: the coding and digital making skills.

You and your young people next!

The projects using the Raspberry Pi Build HATs were such a hit, we’ll be getting them and the LEGO Education SPIKE Prime sets out at every Dojo session from now on! We’re excited to see what young people around the world will be creating thanks to our new collaboration with LEGO Education.

Have you used the Raspberry Pi Build HAT with your learners or young people at home yet? Share their stories and creations in the comments here, or on social media using #BuildHAT.

The post The Raspberry Pi Build HAT and LEGO® components at our CoderDojo appeared first on Raspberry Pi.
Raspberry Pi makes LEGO minifigures play their own music

Post Syndicated from Ashley Whittaker original https://www.raspberrypi.org/blog/raspberry-pi-makes-lego-minifigures-play-their-own-music/

We shared Dennis Mellican’s overly effective anti-burglary project last month. Now he’s back with something a whole lot more musical and mini.

Inspiration

Dennis was inspired by other jukebox projects that use Raspberry Pi, NFC readers, and tags to make music play. Particularly this one by Mark Hank, which we shared on the blog last year. The video below shows Dennis’s first attempt at creating an NFC Raspberry Pi music player, similar to Mark’s.

LEGO twist

After some poking around, Dennis realised that the LEGO Dimensions toy pad is a three-in-one NFC reader with its own light show. He hooked it up to a Raspberry Pi and developed a Python application to play music when LEGO Dimension Minifigures are placed on the toy pad. So, if an Elvis minifigure is placed on the reader, you’ll hear Elvis’s music.

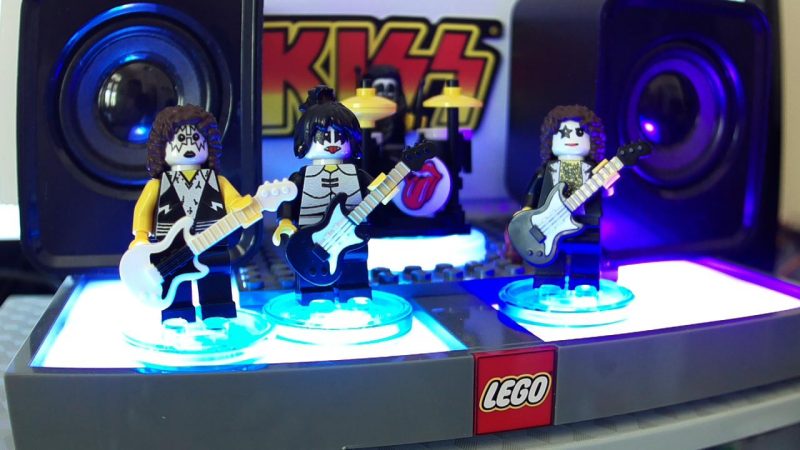
LEGO figures dressed as member of the band KISS
Mini KISS rocking out on the NFC reader

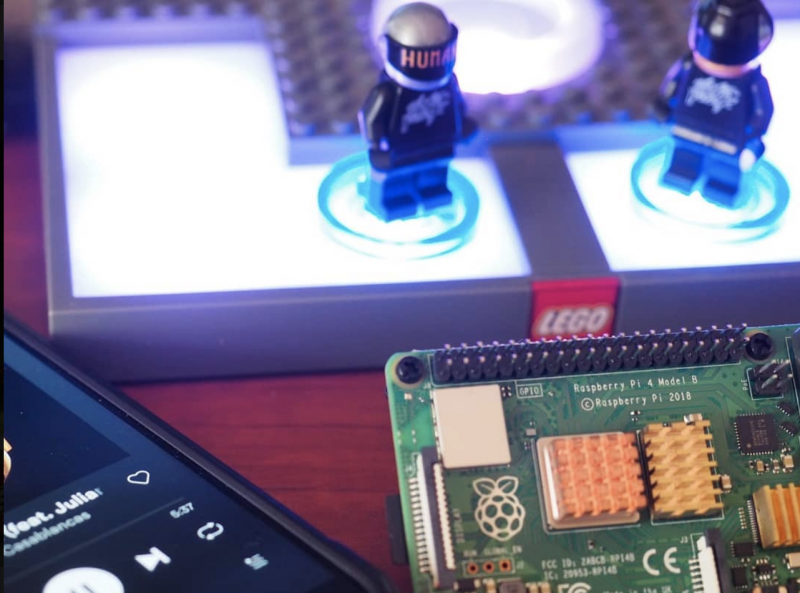
The Raspberry Pi is hooked up to the LEGO Dimensions toy pad, with Musicfig (Dennis’s name for his creation) playing tracks via Spotify over Bluetooth. The small screen behind the minifigures is displaying the Musicfig web application which, like the Spotify app, displays the album art for the track that’s currently playing. 

No Spotify or LEGO? No problem!

Daft Punk LEGO minifgures stood on an NFC reader next to a Raspberry Pi and a phone showing Daft Punk playing on Spotify
Daft Punk LOVES Raspberry Pi

Spotify playback is optional, as you can use your own MP3 music file collection instead. You also don’t have to use LEGO Minifigures: most NFC-enabled devices or tags can be used, including Disney Infinity, Nintendo Amiibo, and Skylander toy characters.

Mini figurines in the shape of various kids film charactera
Why not have Elsa sing… what’s that song again? Let it… what was it?

Dennis thought Musicfig could be a great marketable LEGO product for kids and grown-ups alike, and and he submitted it to the LEGO Ideas website. Unfortunately, he had tinkered a little too much (we approve) and it wasn’t accepted, due to rules that don’t allow non-LEGO parts or customisations.

Want to build one?

The LEGO Dimensions toy pad was discontinued in 2017, but Dennis has seen some sets on sale at a few department stores, and even more cheaply on second-hand market sites like Bricklink. We’ve spotted them on eBay and Amazon too. Dennis also advises that the toy pad often sells for less than a dedicated NFC reader.

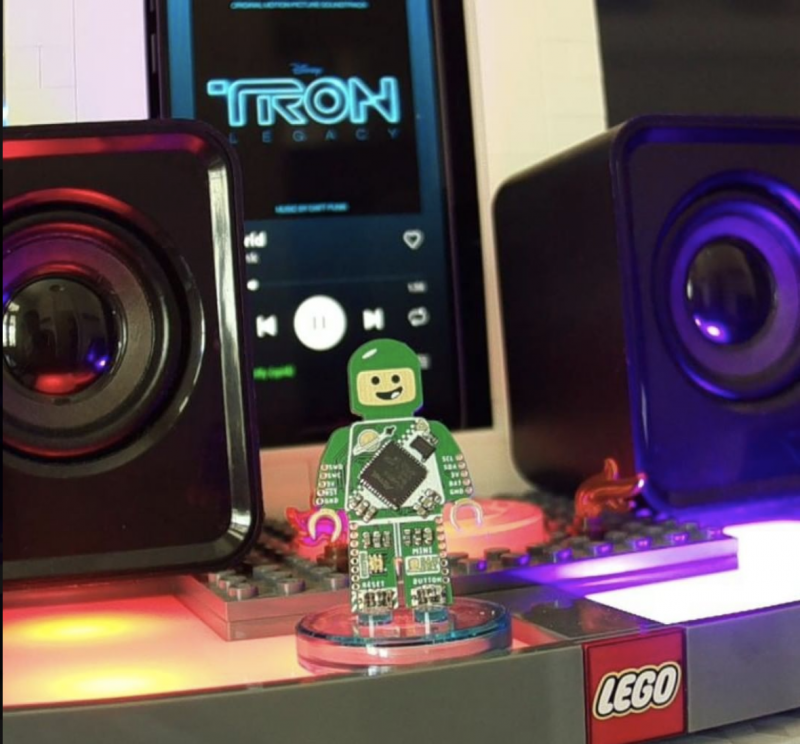
A Tron mini figure on the reader with the Tron movie soundtrack seen playing on the screen behind it
What’s the best movie soundtrack and why is it Tron?

Watch Dennis’s seven-year-old son Benny show you how it all works, from Elvis through to Prodigy via Daft Punk and Queen.

You can tell which songs Benny likes best because the volume goes to 11

There are some really simple step-by-step instructions for a quick install here, as well as a larger gallery of Musicfig rigs. And Dennis hosts a more detailed walkthrough of the project, plus code examples, here.

You can find all things Dennis-related, including previous Raspberry Pi projects, here.

The post Raspberry Pi makes LEGO minifigures play their own music appeared first on Raspberry Pi.
Raspberry Pi LEGO sorter

Post Syndicated from Ashley Whittaker original https://www.raspberrypi.org/blog/raspberry-pi-lego-sorter/

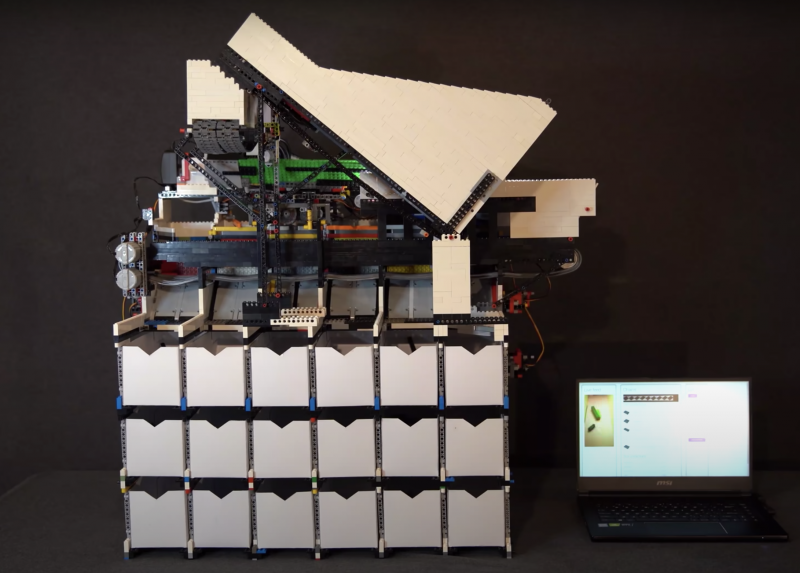
Raspberry Pi is at the heart of this AI–powered, automated sorting machine that is capable of recognising and sorting any LEGO brick.

And its maker Daniel West believes it to be the first of its kind in the world!

Best ever

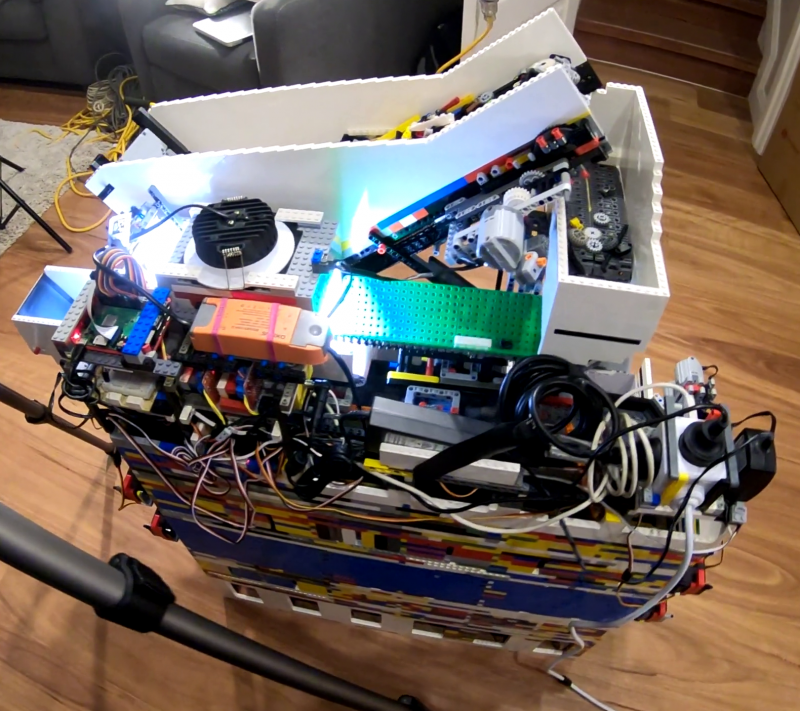
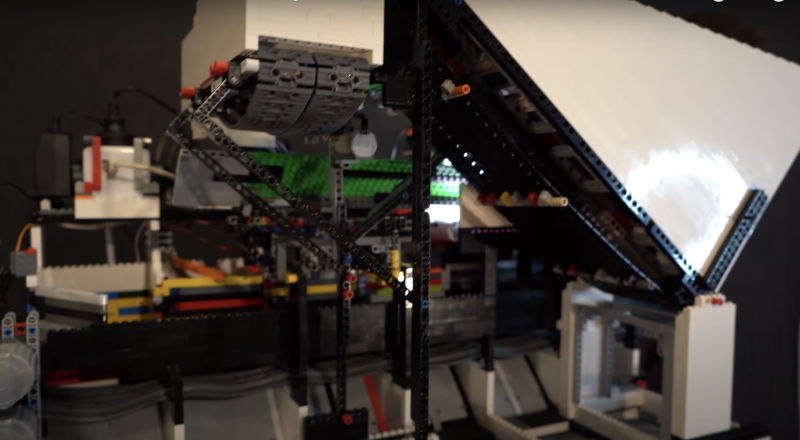
This mega-machine was two years in the making and is a LEGO creation itself, built from over 10,000 LEGO bricks.

A beast of 10,000 bricks

It can sort any LEGO brick you place in its input bucket into one of 18 output buckets, at the rate of one brick every two seconds.

While Daniel was inspired by previous LEGO sorters, his creation is a huge step up from them: it can recognise absolutely every LEGO brick ever created, even bricks it has never seen before. Hence the ‘universal’ in the name ‘universal LEGO sorting machine’.

Hardware

There we are, tucked away, just doing our job

Software

The artificial intelligence algorithm behind the LEGO sorting is a convolutional neural network, the go-to for image classification.

What makes Daniel’s project a ‘world first’ is that he trained his classifier using 3D model images of LEGO bricks, which is how the machine can classify absolutely any LEGO brick it’s faced with, even if it has never seen it in real life before.

We LOVE a thorough project video, and we love TWO of them even more

Daniel has made a whole extra video (above) explaining how the AI in this project works. He shouts out all the open source software he used to run the Raspberry Pi Camera Module and access 3D training images etc. at this point in the video.

LEGO brick separation

The vibration plate in action, feeding single parts into the scanner

Daniel needed the input bucket to carefully pick out a single LEGO brick from the mass he chucks in at once.

This is achieved with a primary and secondary belt slowly pushing parts onto a vibration plate. The vibration plate uses a super fast LEGO motor to shake the bricks around so they aren’t sitting on top of each other when they reach the scanner.

Scanning and sorting

A side view of the LEFO sorting machine showing a large white chute built from LEGO bricks
The underside of the beast

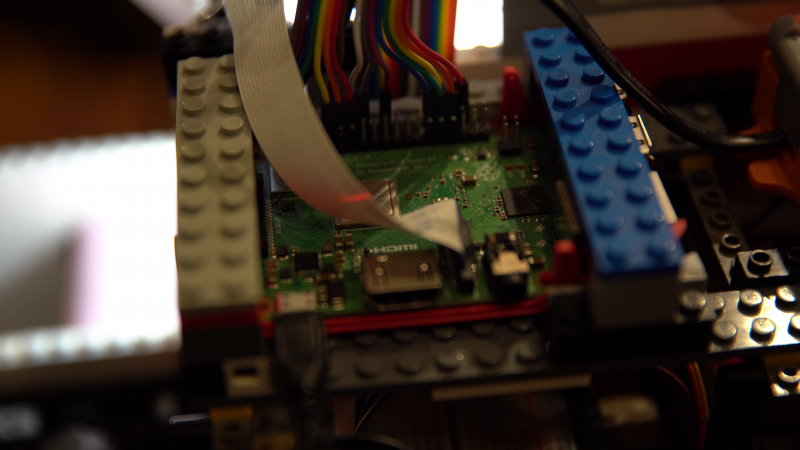
A Raspberry Pi Camera Module captures video of each brick, which Raspberry Pi 3 Model B+ then processes and wirelessly sends to a more powerful computer able to run the neural network that classifies the parts.

The classification decision is then sent back to the sorting machine so it can spit the brick, using a series of servo-controlled gates, into the right output bucket.

Extra-credit homework

A front view of the LEGO sorter with the sorting boxes visible underneath
In all its bricky beauty, with the 18 output buckets visible at the bottom

Daniel is such a boss maker that he wrote not one, but two further reading articles for those of you who want to deep-dive into this mega LEGO creation:

The post Raspberry Pi LEGO sorter appeared first on Raspberry Pi.
Raspberry Pi High Quality Camera takes photos through thousands of straws

Post Syndicated from Ashley Whittaker original https://www.raspberrypi.org/blog/raspberry-pi-high-quality-camera-takes-photos-through-thousands-of-straws/

Adrian Hanft is our favourite kind of maker: weird. He’s also the guy who invented the Lego camera, 16 years ago. This time, he spent more than a year creating what he describes as “one of the strangest cameras you may ever hear about.”

What? Looks normal from here. Massive, but normal

What’s with all the straws?

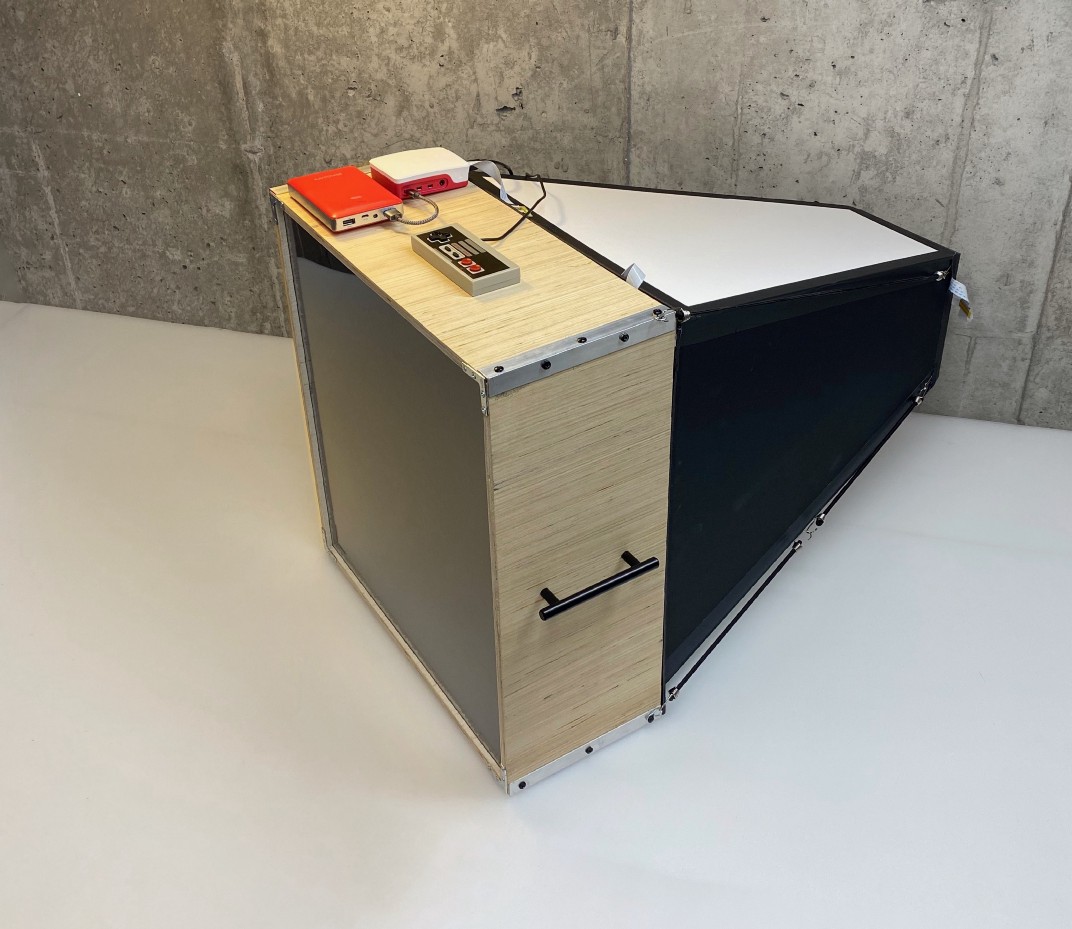
OK, here’s why it’s weird: it takes photos with a Raspberry Pi High Quality Camera through a ‘lens’ of tiny drinking straws packed together. 23,248 straws, to be exact, are inside the wooden box-shaped bit of the machine above. The camera itself sits at the slim end of the black and white part. The Raspberry Pi, power bank, and controller all sit on top of the wooden box full of straws.

Here’s what an image of Yoda looks like, photographed through that many straws:

Mosaic, but make it techy

Ground glass lenses

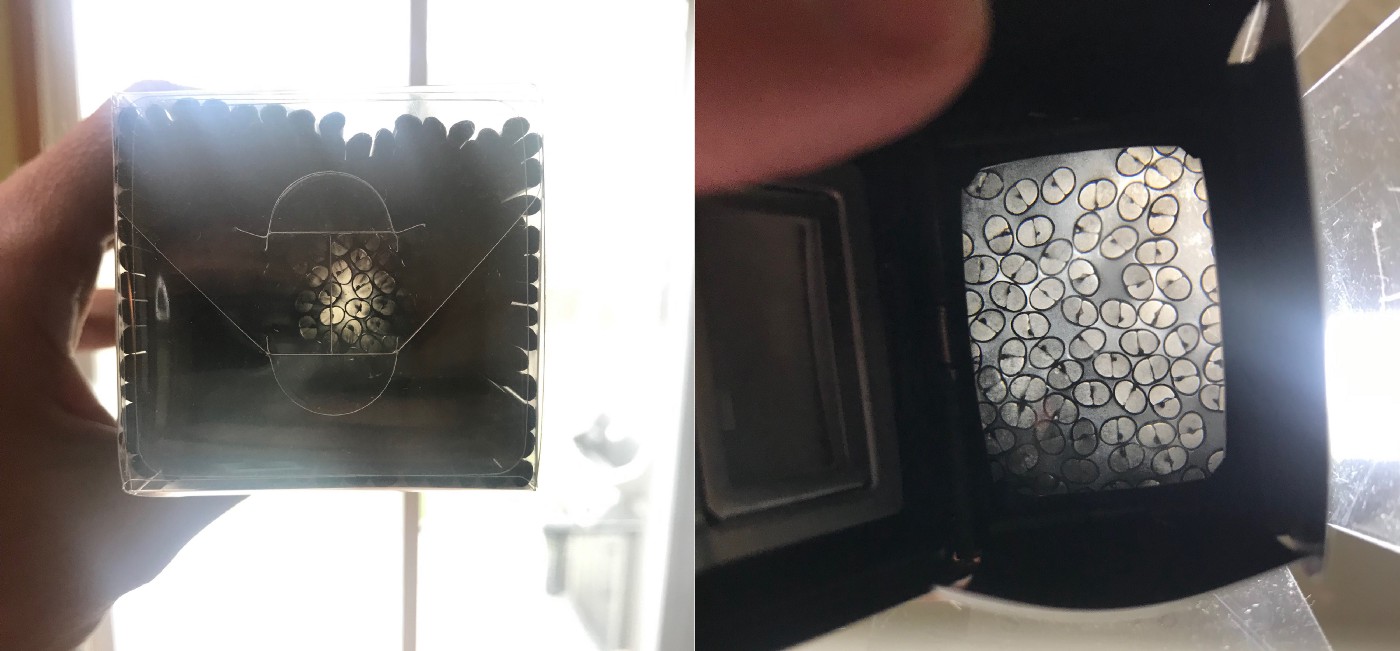
The concept isn’t as easy as it may look. As you can see from the images below, if you hold up a load of straws, you can only see the light through a few of them. Adrian turned to older technology for a solution, taking a viewfinder from an old camera which had ground glass (which ‘collects’ light) on the surface.

Left: looking through straws at light with the naked eye
Right: the same straws viewed through a ground glass lens

Even though Adrian was completely new to both Raspberry Pi and Python, it only took him a week of evenings and weekends to code the software needed to control the Raspberry Pi High Quality Camera.

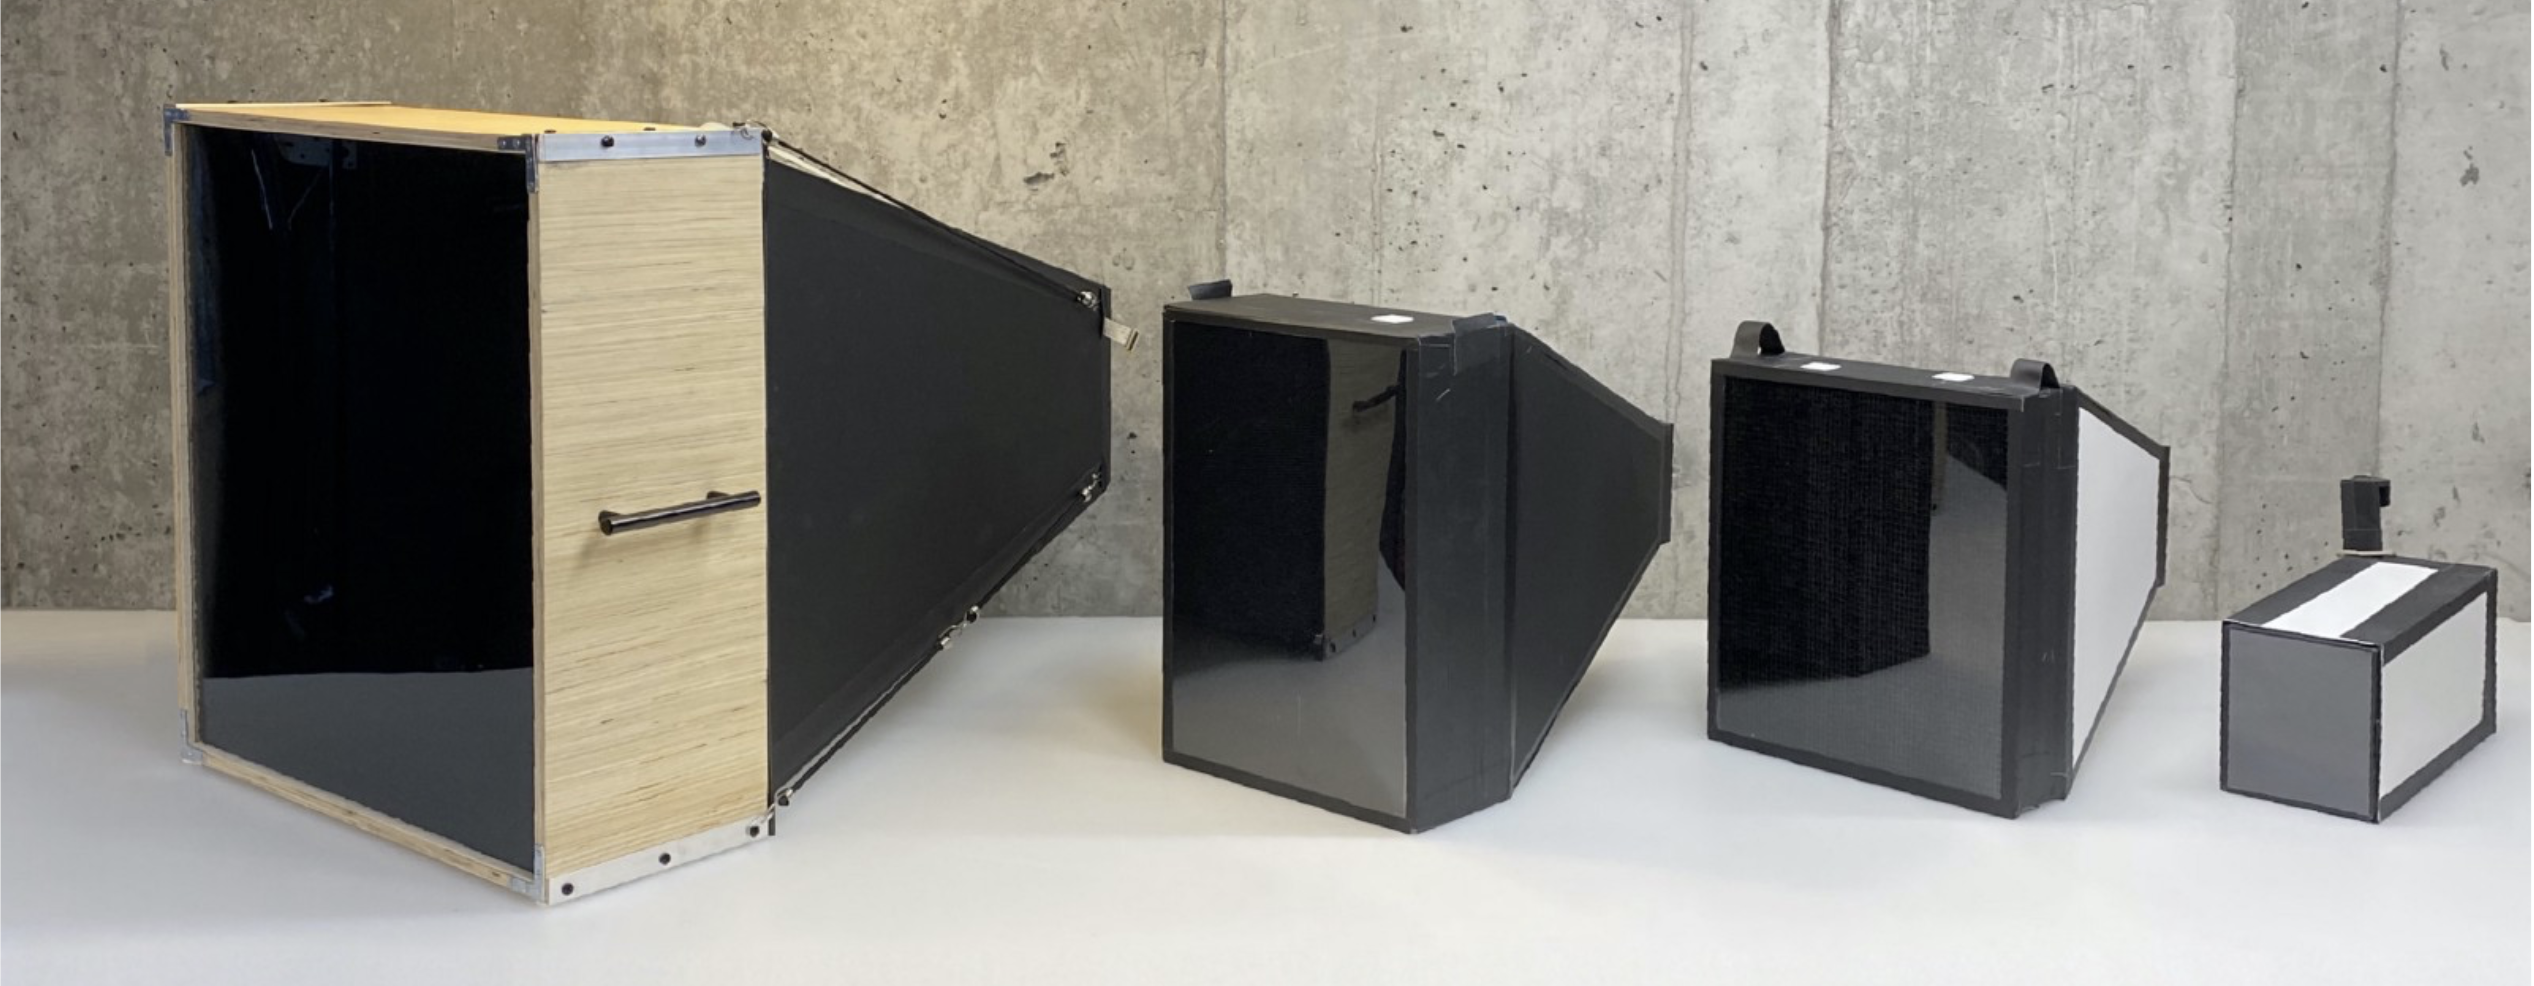
Long story short, on the left is the final camera, with all the prototypes queued up behind it

An original Nintendo controller runs the show and connects to the Raspberry Pi with a USB adapter. The buttons are mapped to the functions of Adrian’s software.

A super satisfying time-lapse of the straws being loaded

What does the Nintendo controller do?

In his original post, Adrian explains what all the buttons on the controller do in order to create images:

“The Start button launches a preview of what the camera is seeing. The A button takes a picture. The Up and Down buttons increase or decrease the exposure time by 1 second. The Select button launches a gallery of photos so I can see the last photo I took. The Right and Left buttons cycle between photos in the gallery. I am saving the B button for something else in the future. Maybe I will use it for uploading to Dropbox, I haven’t decided yet.”

Adrian made a Lego mount for the Raspberry Pi camera
The Lego mount makes it easy to switch between cameras and lenses

A mobile phone serves as a wireless display so he can keep an eye on what’s going on. The phone communicates with the Raspberry Pi connected to the camera via a VPN app.

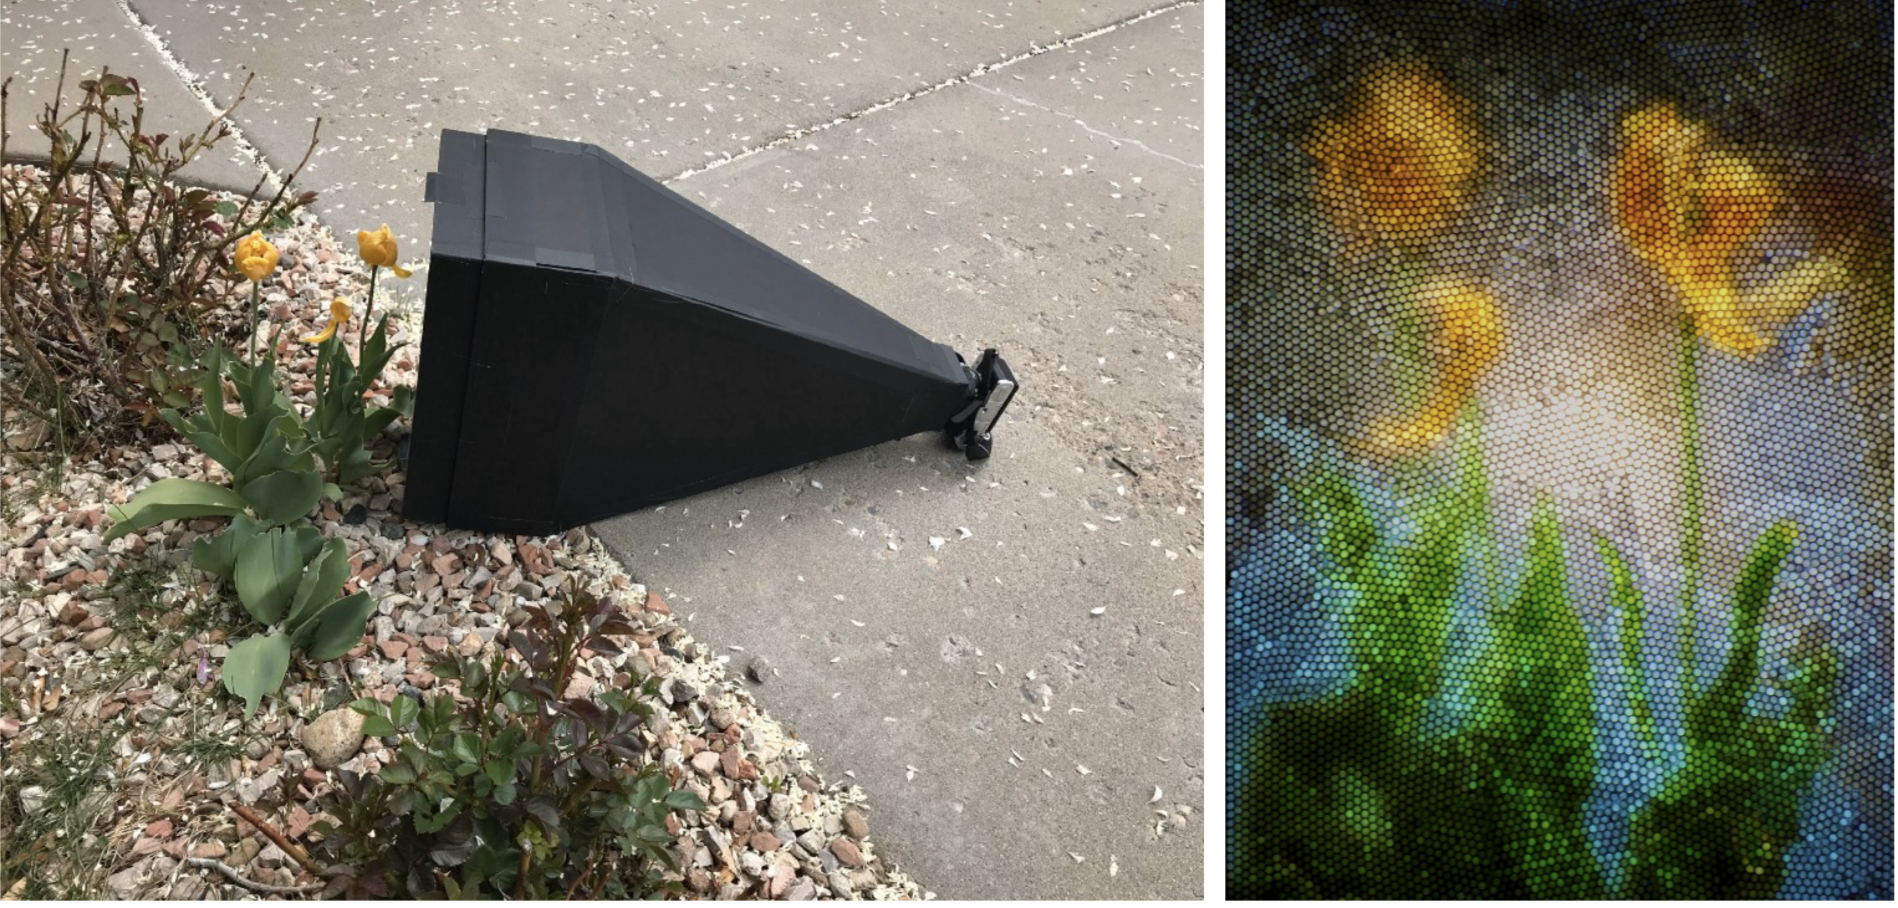
One of the prototypes in action

Follow Adrian on Instagram to keep up with all the photography captured using the final camera, as well as the prototypes that came before it.

The post Raspberry Pi High Quality Camera takes photos through thousands of straws appeared first on Raspberry Pi.